今天要來完成將圖標地點用 Apple Maps 或 Google Maps 來開啟。
URL Scheme
要在 App 之間進行跳轉,就如同網站一般,URL Scheme 是一種特殊的網址格式,它允許 App之間互相溝通、啟動或直接跳轉到 App 內的特定功能頁面。你可以將它想像成專門用來定位 App 功能的網址。
一個 URL Scheme 的結構大概是:scheme://host/path?query,scheme 是 App 的唯一識別符,例如 google maps 的 URL Scheme 為 comgooglemaps://。Host / Path 是主機與路徑,用來指定 App 內部的特定功能或頁面。Query 為查詢參數,用於傳遞資料給 App。例如,在購物 App 中打開特定商品頁面,可以透過參數傳遞商品編號。
開發者在 App 中註冊一個專屬的 URL Scheme。當使用者在手機的任何地方(例如另一個 App 或網頁瀏覽器)點擊這個特殊格式的 URL 時,作業系統(如 iOS 或 Android)會識別這個 Scheme,並啟動對應的 App,同時將後續的路徑和參數傳遞給它處理。
iOS 中 URL Scheme 的基本實踐
在 iOS 開發中,我們常需要透過 URL Scheme 來啟動另一個 App 或跳轉到其特定頁面。核心的實作會圍繞著 UIApplication 的兩個主要方法:open(_:options:completionHandler:) 和 canOpenURL(_:)。
要從 App A 跳轉到 App B,最直接的方式是使用 open(_:options:completionHandler:) 方法。這個 API 是用來取代在 iOS 10 中被棄用的舊版 openURL:。
假設我們要開啟的 App B 其 URL Scheme 為 AppB,實作程式碼如下:
@IBAction func jumpToOtherApp(_ sender: Any) {
    let scheme = "AppB://"
    // 1. 根據 Scheme 建立 URL 物件
    guard let url = URL(string: scheme) else { return }

    // 2. 呼叫 open 方法來嘗試開啟
    UIApplication.shared.open(url, options: [:]) { success in
        if success {
            print("成功開啟 AppB")
        } else {
            print("開啟失敗")
        }
    }
}
一個重要的經驗是,open 方法的執行並不受白名單限制。只要目標 App(AppB)確實安裝在使用者的裝置上,且 URL Scheme 正確,這個呼叫就能成功開啟它。
既然直接 open 就能運作,那為什麼我們還需要 canOpenURL(_:) 這支 API 呢?
canOpenURL 的主要目的在於「查詢」,它讓開發者可以在嘗試跳轉前,先判斷系統上是否有任何 App 能夠回應這個 URL Scheme。例如,如果檢查後發現使用者並未安裝 App B,我們可以引導他們前往 App Store 下載,而不是讓 open 呼叫然後就無聲無息地失敗。
然而,自 iOS 9 起,基於隱私保護,蘋果對 canOpenURL 的使用加上了限制。App 不能再任意探測使用者安裝了哪些應用程式。你必須在專案的 Info.plist 檔案中,明確宣告您打算查詢的 URL Schemes。這個宣告是透過 LSApplicationQueriesSchemes 這個鍵來設定的,它是一個包含多個 Scheme 字串的陣列。
UI 建立
在談完了 URL Scheme 的基本觀念,接下來要回到我們的 App,我們先需要安插跳轉到 Apple Maps 與 Google Maps 的按鈕到我們的 sheet 上。
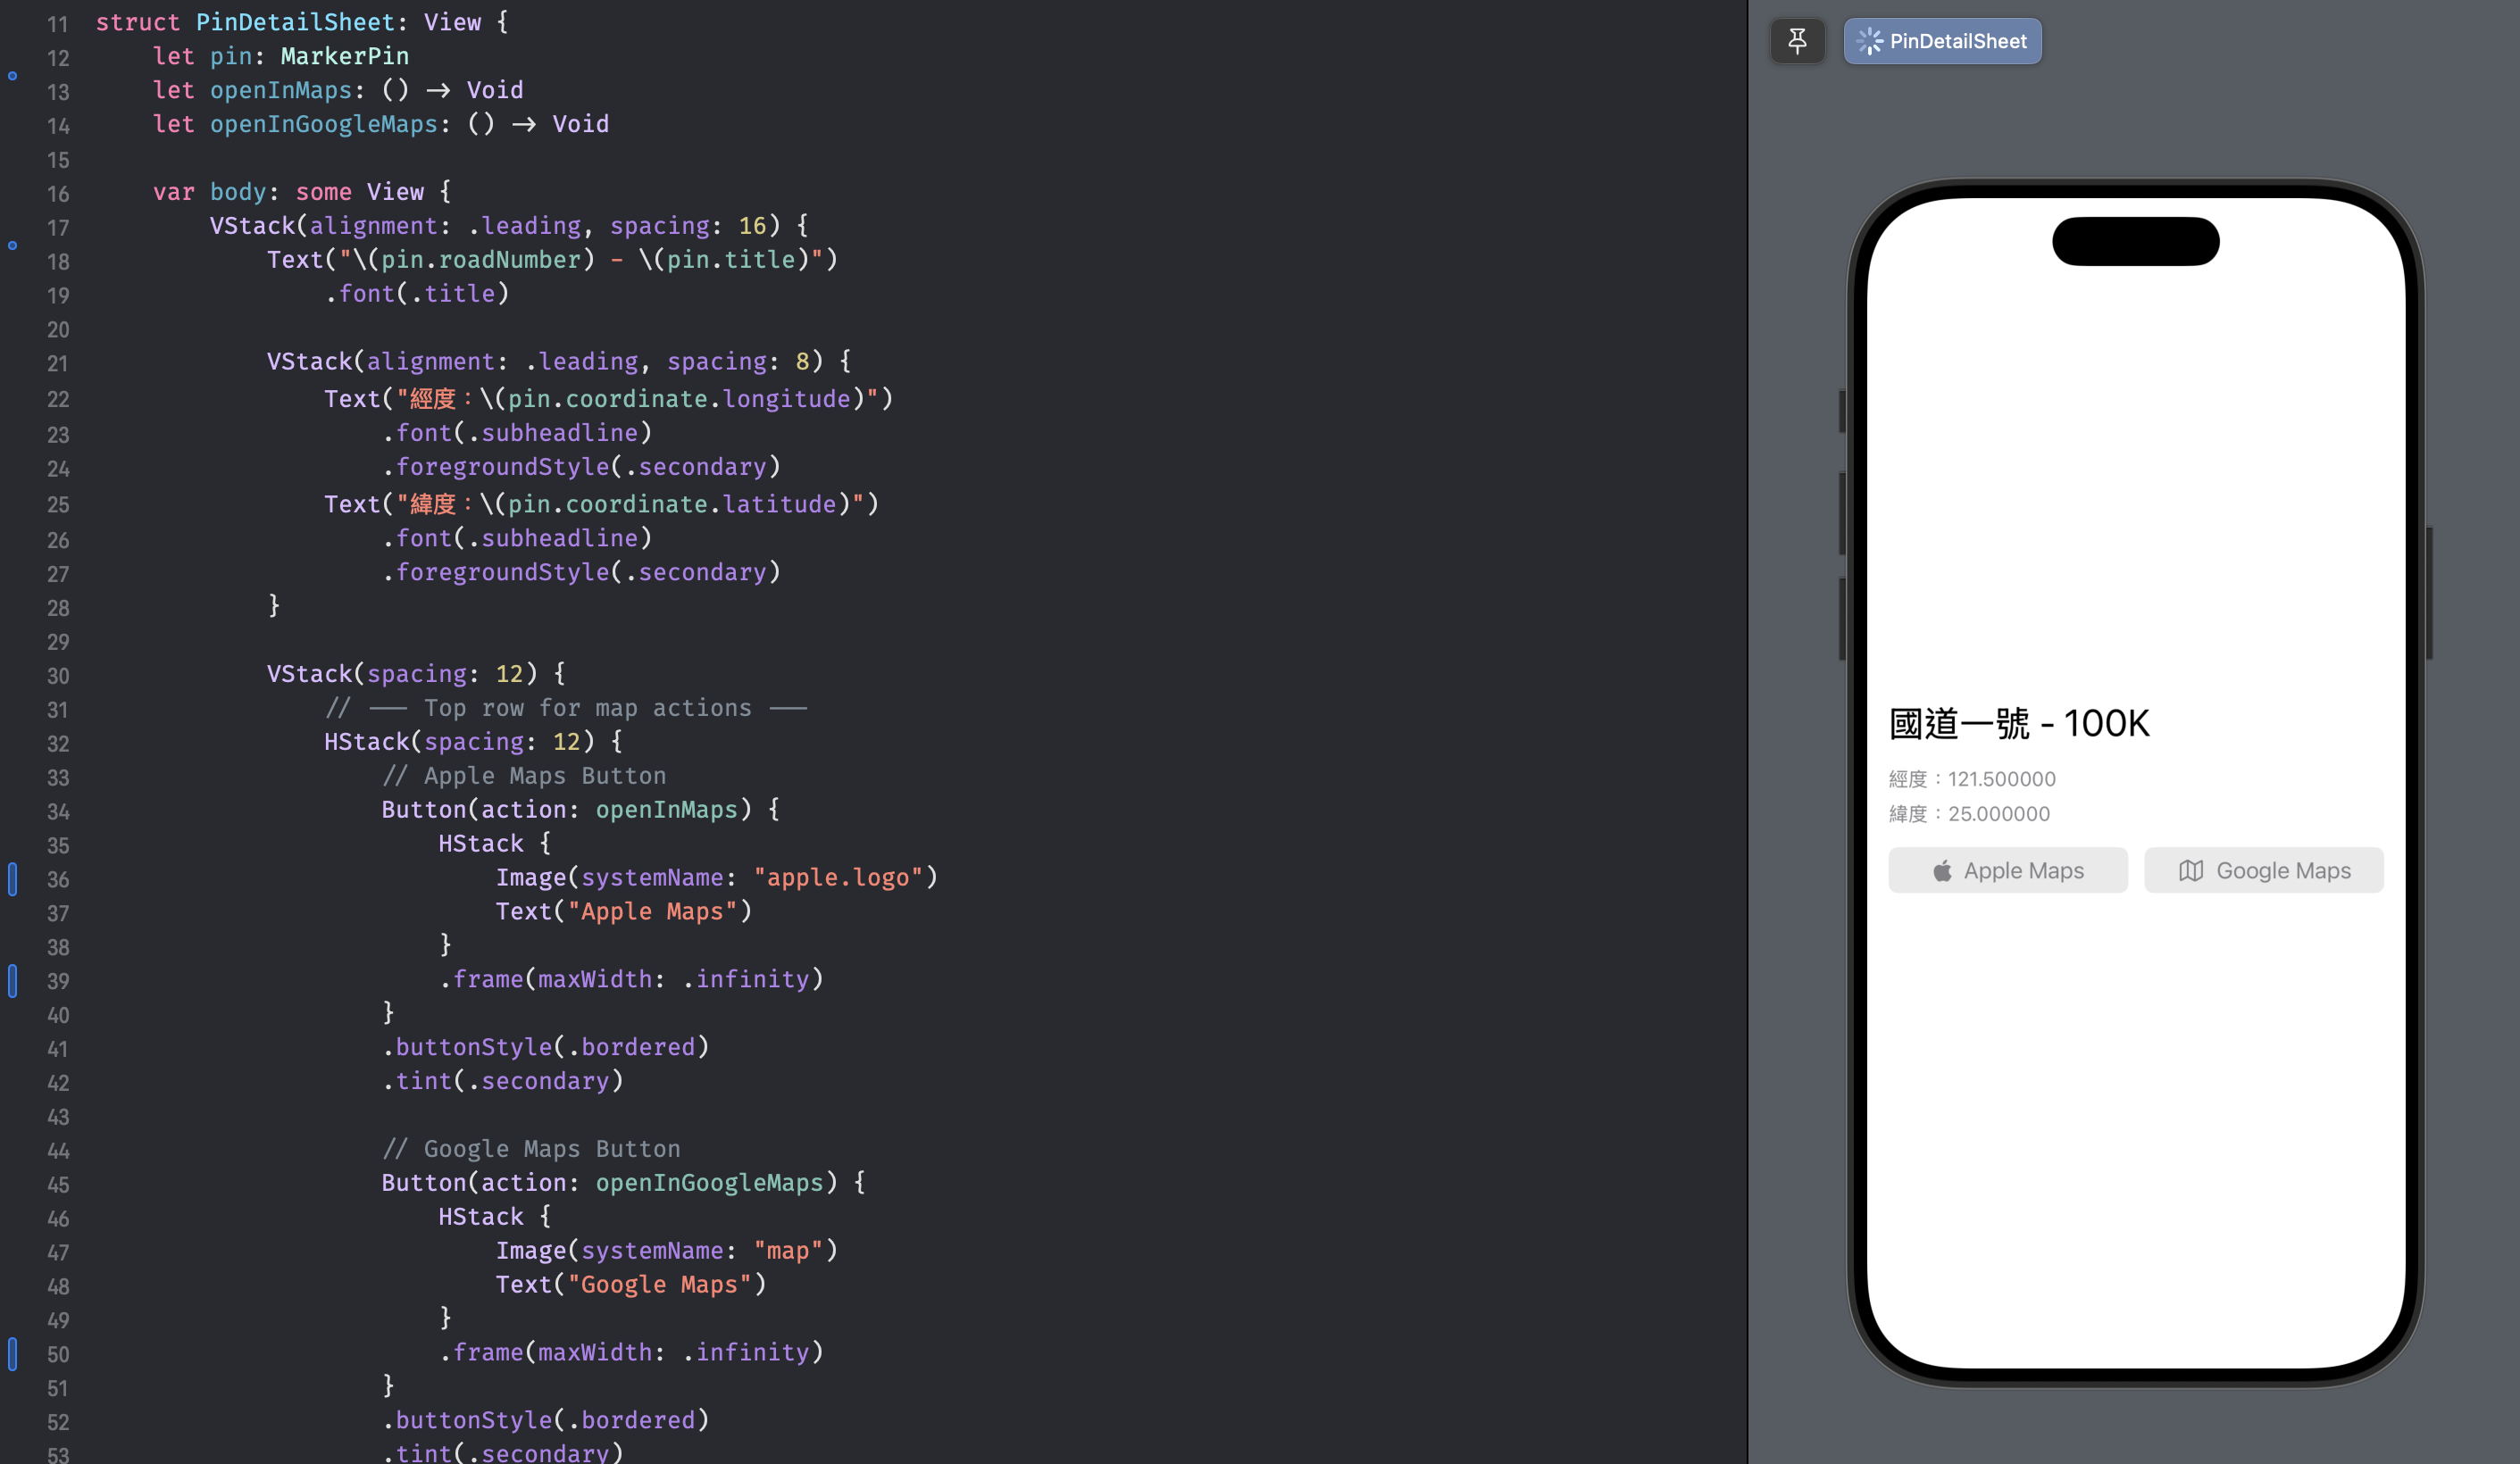
這邊也可以看到我們將 PinDetailSheet 獨立出來的好處,這樣就可以透過 SwiftUI 的 Preview 來針對這個元件進行預覽。
兩個按鈕(Apple Maps 和 Google Maps)水平放置在一個 HStack 容器中。透過對每個按鈕都設定 .frame(maxWidth: .infinity),它們會平均分配可用的橫向空間,因此兩個按鈕會一樣寬,並共同填滿整個畫面的寬度。
順帶一提,我這裡按鈕的實際功能,也就是開啟地圖的邏輯,是透過 closure openInMaps 和 openInGoogleMaps 從外部傳入的。這樣可以將畫面的呈現與功能邏輯分離,讓 PinDetailSheet 變得更加單純。
struct PinDetailSheet: View {
    // ...
    let openInMaps: () -> Void
    let openInGoogleMaps: () -> Void
    // ...

    var body: some View {

            // ...

        VStack(spacing: 12) {
            HStack(spacing: 12) {
                // Apple Maps Button
                Button(action: openInMaps) { // 點擊後會執行傳入的 closure
                    HStack {
                        Image(systemName: "apple.logo")
                        Text("Apple Maps")
                    }
                    .frame(maxWidth: .infinity)
                }
                .buttonStyle(.bordered)
                .tint(.secondary)

                // Google Maps Button
                Button(action: openInGoogleMaps) { // 點擊後會執行傳入的 closure
                    HStack {
                        Image(systemName: "map")
                        Text("Google Maps")
                    }
                    .frame(maxWidth: .infinity)
                }
                .buttonStyle(.bordered)
                .tint(.secondary)
            }
        }
    }
    .padding(EdgeInsets(top: 12, leading: 16, bottom: 20, trailing: 16))
}
跳轉邏輯建立
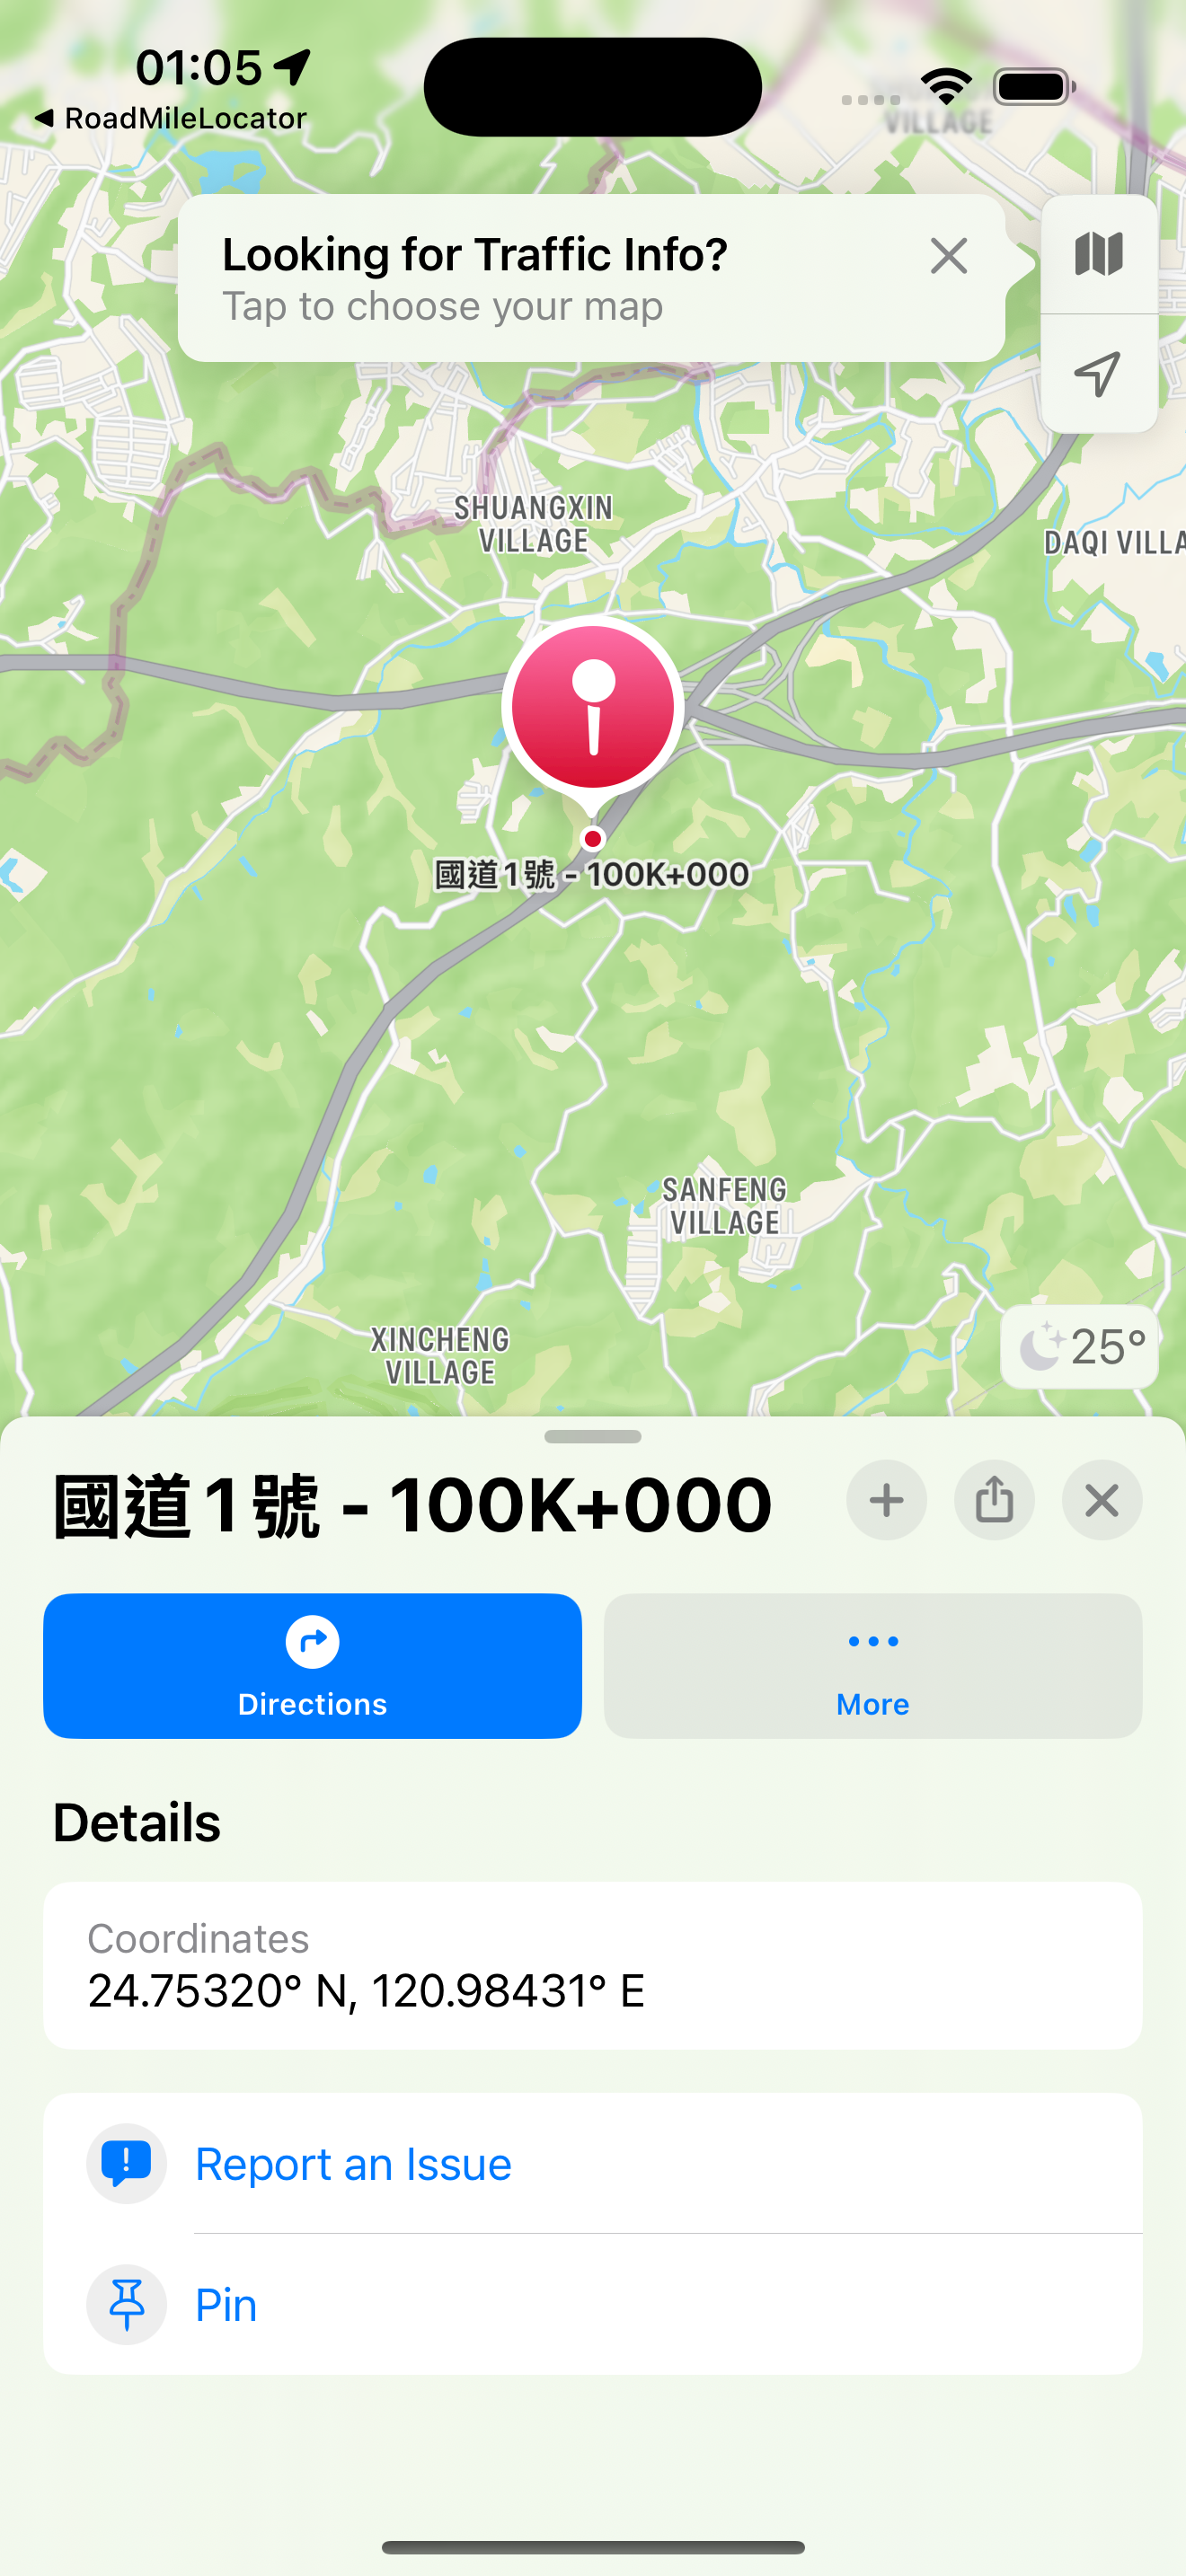
Apple Maps
Apple Maps 因為是蘋果官方內建的 App,因此不需要我們自己操作 open(_:options:completionHandler:),而是使用 Mapkit 提供的方法跳轉。
private func openInAppleMaps(coordinate: CLLocationCoordinate2D, name: String) {
    let placemark = MKPlacemark(coordinate: coordinate)
    let mapItem = MKMapItem(placemark: placemark)
    mapItem.name = name
    mapItem.openInMaps()
}
MKPlacemark 是用來存放地理資訊,例如經緯度座標、地址等。這裡我們用傳入的座標來初始化它。接著,用建立好的 placemark 來建立一個 MKMapItem 物件。MKMapItem 是 Apple Map 上的一個具體項目,不僅包含位置資訊,還能帶有名稱、電話號碼等屬性。
最後,呼叫 openInMaps() 方法開啟 Apple Maps,並將畫面帶到到 mapItem 所代表的位置上:
Google Maps
而 Goole Maps 是外部第三方 App,就必須得呼叫跳轉的 API:
- Info.plist 加入 LSApplicationQueriesSchemes
<key>LSApplicationQueriesSchemes</key>
<array>
    <string>comgooglemaps</string>
</array>
- 實作跳轉邏輯
private func openInGoogleMaps(coordinate: CLLocationCoordinate2D, name: String) {
    let urlScheme = "comgooglemaps://?q=\(coordinate.latitude),\(coordinate.longitude)&zoom=14"
    let webURL = "https://www.google.com/maps/search/?api=1&query=\(coordinate.latitude),\(coordinate.longitude)"

    if let appURL = URL(string: urlScheme), UIApplication.shared.canOpenURL(appURL) {
        UIApplication.shared.open(appURL, options: [:], completionHandler: nil)
    } else if let browserURL = URL(string: webURL) {
        UIApplication.shared.open(browserURL, options: [:], completionHandler: nil)
    }
}
同樣地,將經緯度資訊帶入 URL Scheme 中,詳細用法可以參考 Google 官方文件的說明。
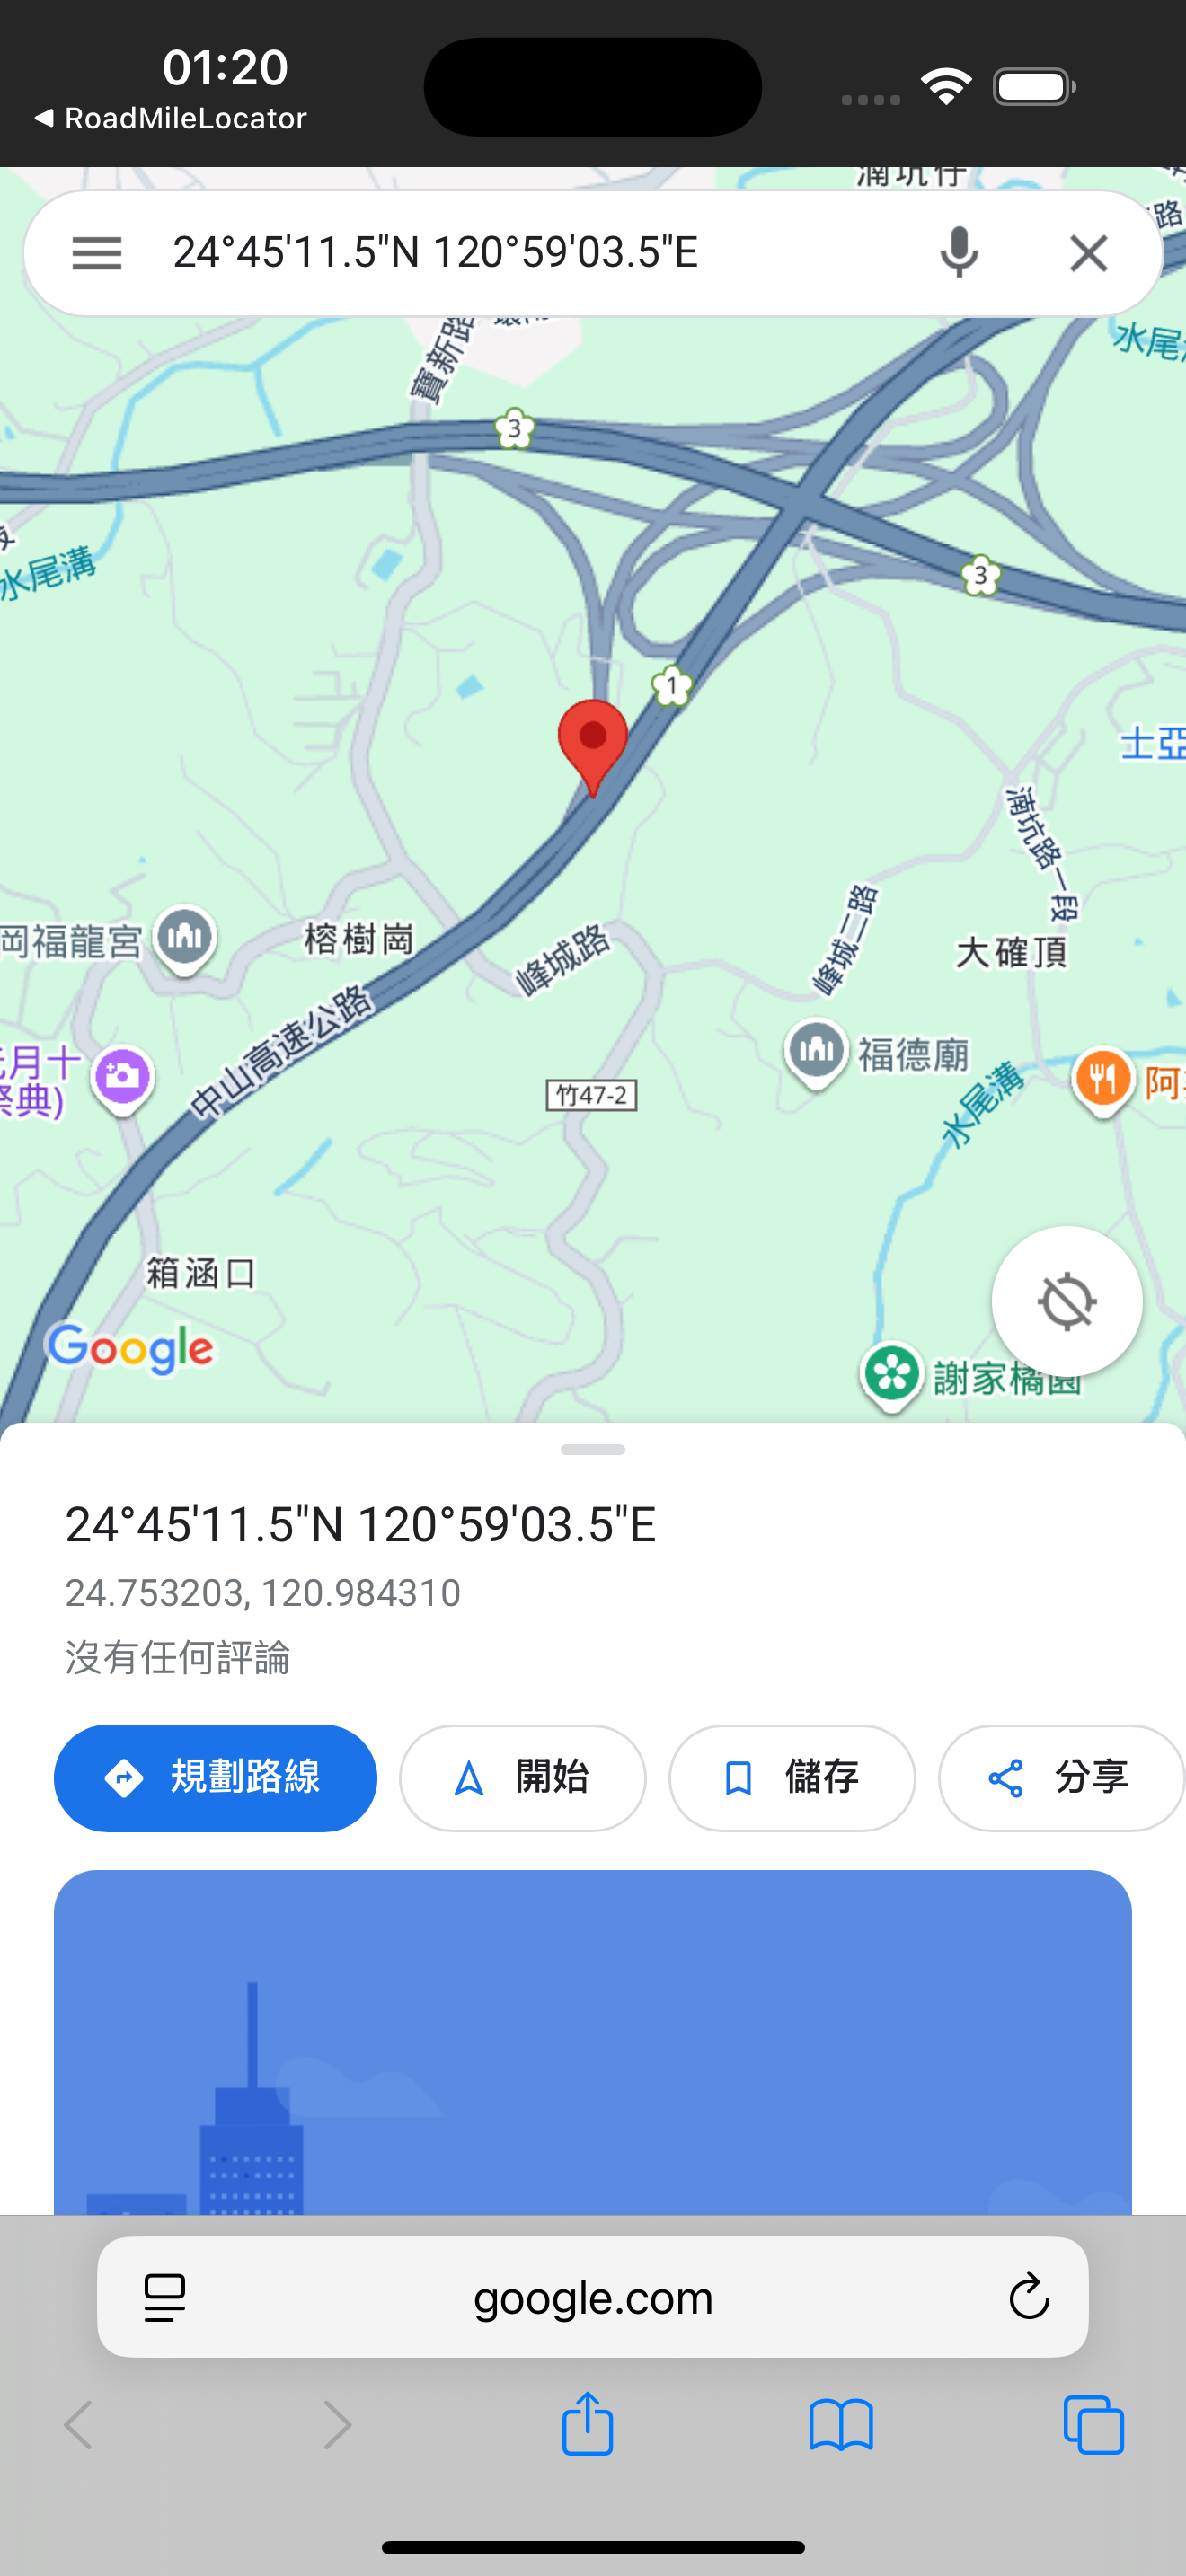
如果 canOpenURL 回傳 false,我們就用網頁版打開 Google Maps。
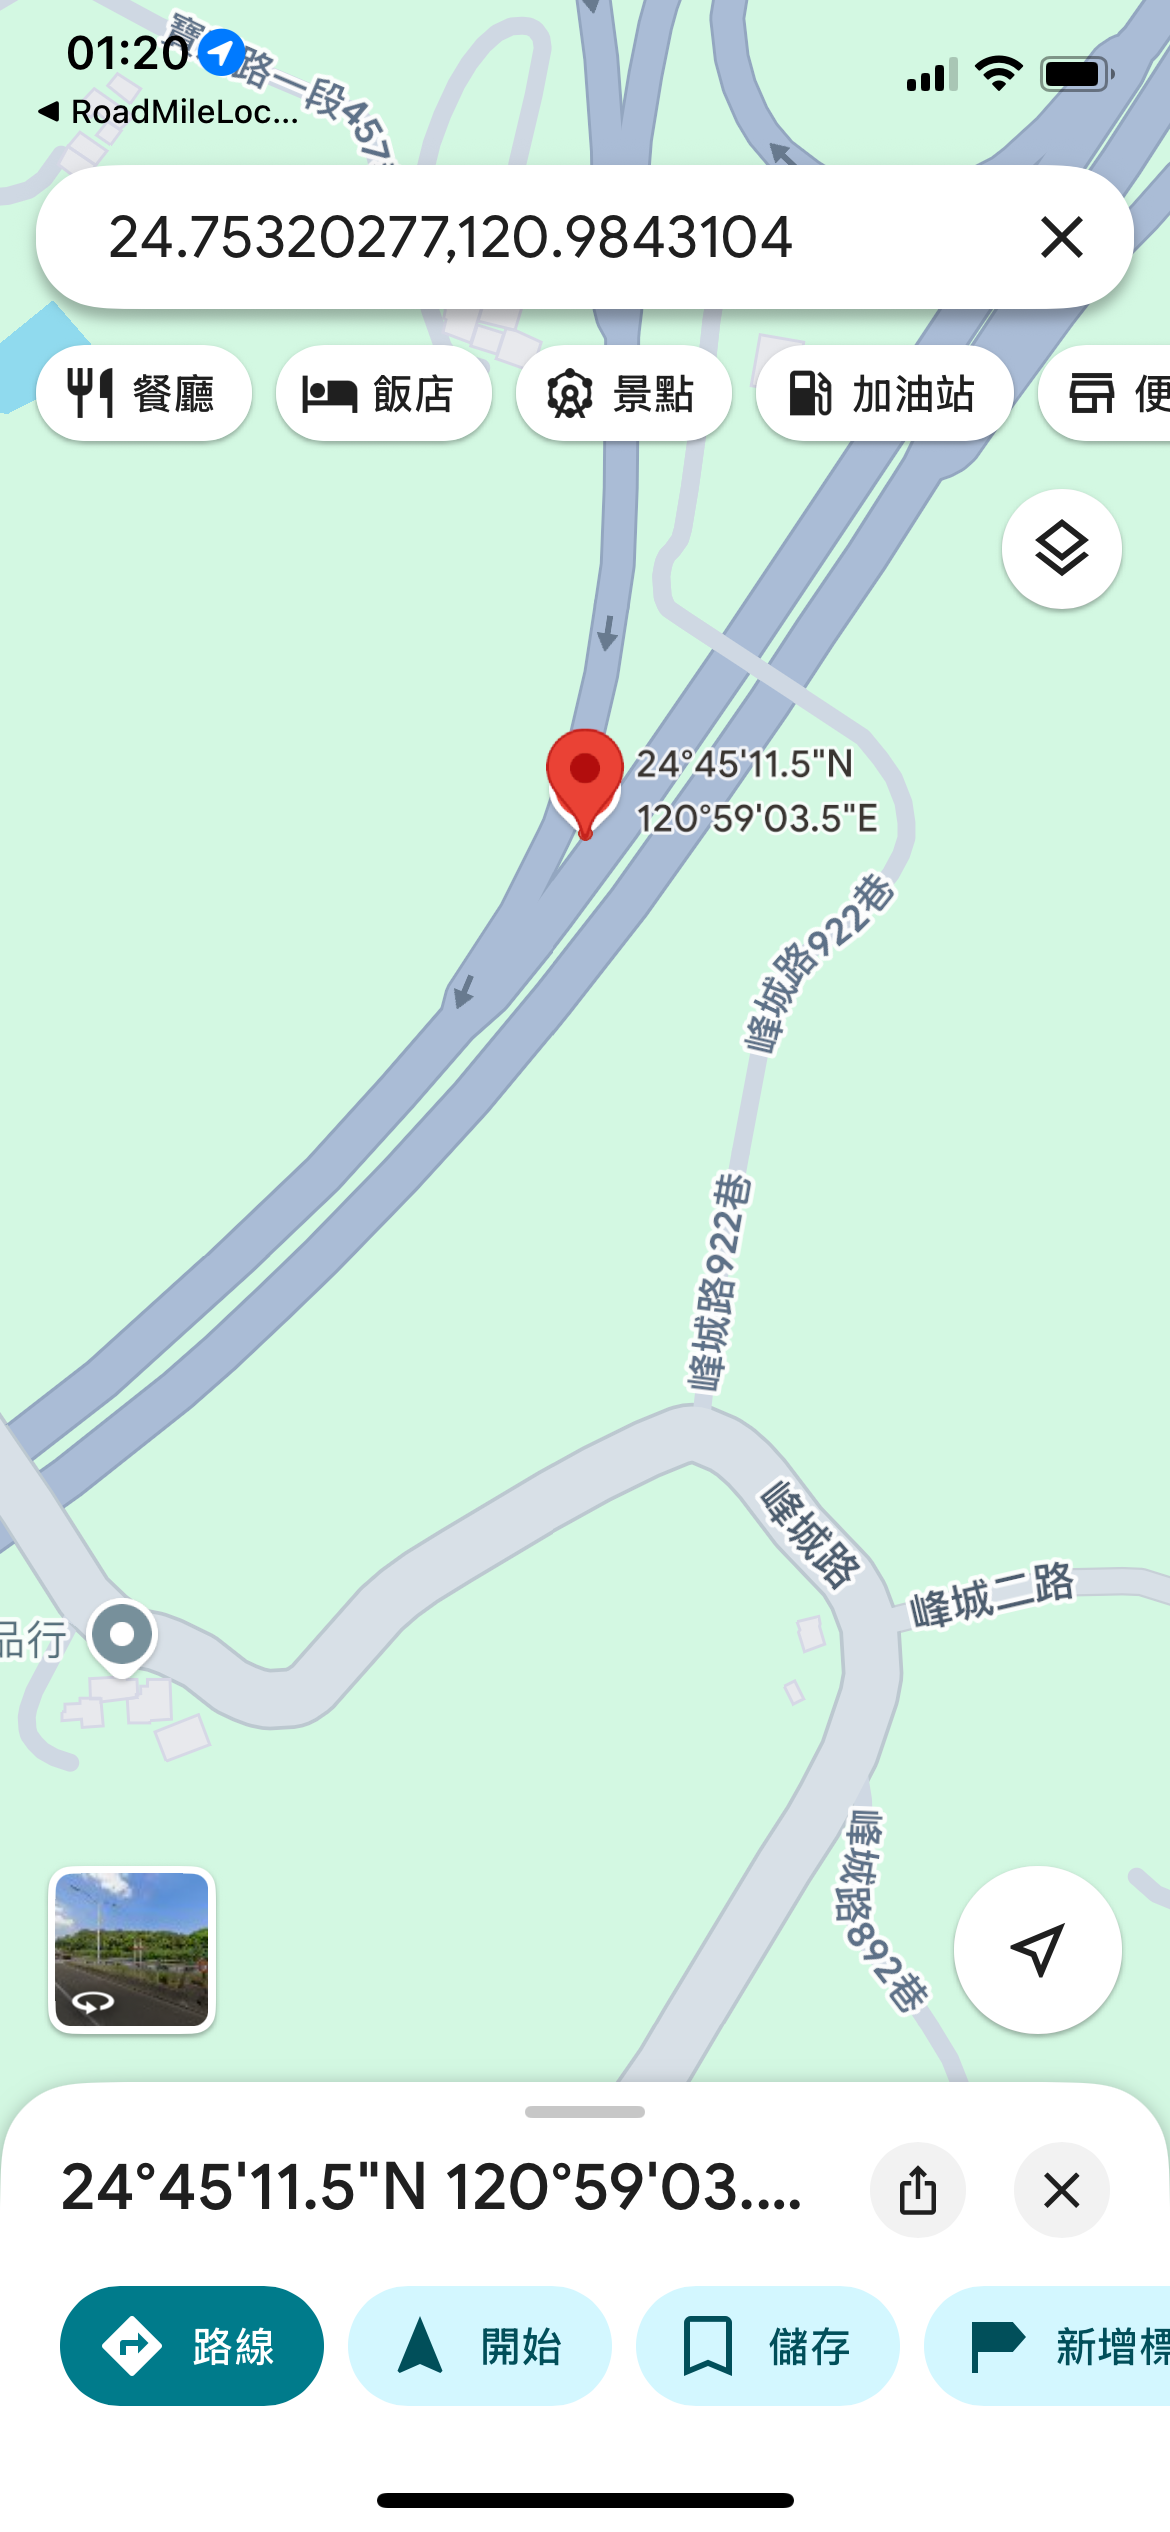
測試結果
實機測試,有安裝 Google Maps App,可以成功用 App 開啟。
而用模擬器測試,因為未安裝 Google Maps App,所以用網頁版打開。
本日小結
今天我們成功地為 App 整合了開啟外部地圖的功能。我們學習了 URL Scheme 的基本概念,並實際運用它來與 Apple Maps 和 Google Maps 進行互動。
雖然同樣是開啟地圖,但內建的 Apple Maps 我們可以使用 MapKit 框架中簡潔的 MKMapItem.openInMaps() 方法;而對於第三方的 Google Maps,則需要我們手動組合 URL Scheme,並透過 canOpenURL 搭配白名單來檢查 App 是否安裝,以提供更完善的使用者體驗與備用方案。
明天我們將實作地理圍欄 (Geofencing),當使用者開車靠近我們預先設定好的里程標時,App 將能自動發出通知提醒。
而里程定位與地圖顯示功能這個功能也算開發完成,同樣記得在一個功能完成後,合併回 develop 分支,並且將相關的 work items 給 close 掉,再來進行我們的下一步。